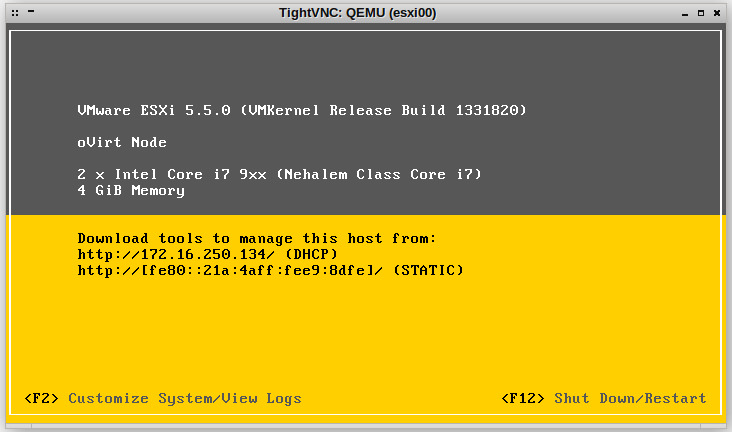
Getting VMware ESXi to install and run properly under oVirt was an interesting experience. However, it does require patching Qemu.
Please note: I am assuming your oVirt host is Fedora 20. You may skip Step 1 if you have already installed my patched RPMS. However, read on if your curious why the patches are needed.
Step 1 – Patching Qemu
Current SRPM for patching Qemu is here: qemu-1.6.2-7.fc20.src.rpm
Please note: I am using the SRPM from the Fedora repository instead of the latest source from Qemu. I prefer it this way as it reduces potential compatibility issues.
QEMU Patch 1: VMware IO Port Emulation
When you install ESXi it will attempt to use this incomplete emulated port and PSOD, you need to disable this in Qemu itself with the following patch:
--- a/hw/i386/pc_piix.c	2014-08-21 13:52:26.819006292 +0100
+++ b/hw/i386/pc_piix.c	2014-08-20 15:00:19.808038672 +0100
@@ -183,7 +183,7 @@
     pc_vga_init(isa_bus, pci_enabled ? pci_bus : NULL);

     /* init basic PC hardware */
-    pc_basic_device_init(isa_bus, gsi, &rtc_state, &floppy, xen_enabled());
+    pc_basic_device_init(isa_bus, gsi, &rtc_state, &floppy, 1);

     pc_nic_init(isa_bus, pci_bus);
Dagrh has submitted a patch upstream, which is a better version of the above patch and its merged with all major versions of qemu.
QEMU Patch 2: vmxnet3 Does Not Pad Short Frames
I fully installed VMware ESXi and realized networking was not working as expected. It was pretty bizarre as the ESXi guest would receive packets from a routed network without issues.
Oddly though, any Linux guests on the same bridge and host could communicate with each other but failed to communicate with the ESXi guest itself or the guests ESXi hosted. I have to thank Paul Sherratt for helping me figure out this odd networking issue. The problem was that short Ethernet frames were not being padded, ESXi would simply discard these frames including ARP Requests and this prevented communication.
So I thought the best way to fix this problem was to write a patch and get vmxnet3 to pad short frames itself. This will ensure frames do not get discarded by the ESXi guest.
--- a/hw/net/vmxnet3.c	2014-08-21 13:52:49.379006588 +0100
+++ b/hw/net/vmxnet3.c	2014-08-20 15:00:19.811038672 +0100
@@ -34,6 +34,7 @@

 #define PCI_DEVICE_ID_VMWARE_VMXNET3_REVISION 0x1
 #define VMXNET3_MSIX_BAR_SIZE 0x2000
+#define MIN_BUF_SIZE 60

 #define VMXNET3_BAR0_IDX      (0)
 #define VMXNET3_BAR1_IDX      (1)
@@ -1862,12 +1863,21 @@
 {
     VMXNET3State *s = qemu_get_nic_opaque(nc);
     size_t bytes_indicated;
+    uint8_t min_buf[MIN_BUF_SIZE];

     if (!vmxnet3_can_receive(nc)) {
         VMW_PKPRN("Cannot receive now");
         return -1;
     }

+    /* Pad to minimum Ethernet frame length */
+    if (size < sizeof(min_buf)) {
+        memcpy(min_buf, buf, size);
+        memset(&min_buf[size], 0, sizeof(min_buf) - size);
+        buf = min_buf;
+        size = sizeof(min_buf);
+    }
+
     if (s->peer_has_vhdr) {
         vmxnet_rx_pkt_set_vhdr(s->rx_pkt, (struct virtio_net_hdr *)buf);
         buf += sizeof(struct virtio_net_hdr);
I have submitted this patch upstream. This patch has been merged with all major versions of qemu.
Step 2 – oVirt Host/Engine Preparation
Installing Required VDSM Hooks
The following two hooks allows for nested virtualization and mac spoofing.
-----------
-[ Host ] -
-----------
# yum install -y vdsm-hook-nestedvt
# yum install -y vdsm-hook-macspoof
Please note: You’ll need to reboot the oVirt host at some point before nested virtualization is enabled for the kvm_{intel,amd} modules. However, VMware ESXi will install without this being enabled so you can continue.
By default oVirt only allows you to select the following NIC Models rtl8139, e1000 and VirtIO, unfortunately ESXi does not work with any of them. I have created a custom vdsm hook so the NIC Type can be changed at boot up.
Create a file: /usr/libexec/vdsm/hooks/before_vm_start/50_vmwarehost with the below code and ensure it has 755 permissions, this must be created on the oVirt host.
#!/usr/bin/python
# Source: https://xrsa.net
# Author: Ben Draper
# Email: [email protected]
#

import os
import hooking

def changeInterfaceType(interface):
    """
    Verify the interface has been set to virtio, if so
    change the NIC type to vmxnet
    """
    for filterElement in interface.getElementsByTagName('model'):
        if isInterfaceFilter(filterElement):
            filterElement.setAttribute('type','vmxnet3')


def isInterfaceFilter(filterElement):
    """
    Verify we have the interface set to virtio
    """
    filterValue = filterElement.getAttribute('type')
    return filterValue == 'virtio'


def main():

    if hooking.tobool(os.environ.get('vmwarehost')):
        domxml = hooking.read_domxml()

        for interface in domxml.getElementsByTagName('interface'):
            changeInterfaceType(interface)

        hooking.write_domxml(domxml)


if __name__ == '__main__':
    main()
Now that we have finished installing the hooks we need to make sure the engine and host can use them.
-------------
-[ Engine ] -
-------------
# engine-config -s "UserDefinedVMProperties=macspoof=(true|false);vmwarehost=(true|false)"
# service ovirt-engine restart
-----------
-[ Host ] -
-----------
# service vdsmd restartDisabling MSR Emulation
This will need to be disabled globally.
-----------
-[ Host ] -
-----------
# echo 1 > /sys/module/kvm/parameters/ignore_msrs
# echo 'options kvm ignore_msrs=1' > /etc/modprobe.d/kvm.conf
This is all we need to do in the back end.
Step 3 – Create VMware ESXi VM
To get the VMware ESXi guest to install properly ensure the following is set.
- 2 x vCPUs
- 4GB RAM
- Operating System: Other OS
- Optimized for: Server
- Custom Properties: vmwarehost = true, macspoof = true
- NIC Type: VirtIO (My hook will change this at run time to vmxnet3)
- Disk Type: IDE

Step 4 – Modify ESXi Host Configuration
You would have noticed your VMware installation warn you about not being able to run 64bit guests due to invalid virtualization support, even though KVM was configured to push the required nested virtualization flags to the virtual machine. KVM does not fully implement all the required features, therefore VMware must emulate them.
Ensure you add the following options in /etc/vmware/config
hv.assumeEnabled = "TRUE"
vmx.allowNested = "TRUE"
Once you have added those options to the configuration file reboot your ESXi server.